
Software · guide
How to screenshot on Mac: the four ways
By Alberto Gulotta · Updated · 8 min read
Nothing needs installing for this. Everything under how to screenshot on mac is already on the machine: Apple’s support page lists four ways — the entire screen, a portion of it, a window or menu, and the Screenshot app.
Three shortcuts, and the app behind them
Apple’s own instructions, from a page last published on 14 September 2026 and read on 28 September 2026; the screen recording in the last row is on Apple’s recording page.
Then there is the question of where the file went. Apple: “By default, screenshots save to your desktop with the name ‘Screen Shot [date] at [time].’” Apple’s Mac User Guide gives the name differently — “Filenames begin with ‘Screenshot’ or ‘Screen Recording’ and include the date and time” — so look for either. Each capture becomes a file — a few seconds later when the floating thumbnail is showing — unless you tell it not to.
“Instead of pressing Shift-Command-3, press Control-Shift-Command-3.”
Adding Control to any of the three capture shortcuts puts the picture on the clipboard instead of on the desktop. If you are about to paste the screenshot into a message or a document, that is the version you want — and it leaves nothing behind to tidy up later.
The options live in an app. Apple: “in macOS Mojave 10.14 or later, you can also use the Screenshot app to take a screenshot. To open the app, press Shift-Command-5. Or find the Screenshot app in the Utilities folder of your Applications folder.” Its Options menu includes these: “set a screenshot timer”, “choose where screenshots are saved”, “choose whether to show the floating thumbnail after taking a screenshot”, “choose whether to show the mouse pointer in your screenshot” and, “On supported Mac models using macOS Tahoe 26 or later”, a choice of capture format. The keys themselves can be changed in System Settings › Keyboard › Keyboard Shortcuts › Screenshots.
Each of the first four answers a different problem. A desktop buried in screenshots is one setting. A thumbnail that gets in the way of the next shot is another. A delay before the capture is the timer. And a pointer that either must appear — because you are showing someone what to click — or must not, is the fourth.
Two smaller notes from the same page. The thumbnail is not on a fixed timer: “if you hold your mouse pointer over the screenshot thumbnail, the thumbnail remains onscreen until you act on the thumbnail or move the pointer away.” And a failure that is not yours: “some apps, such as the Apple TV app, might not let you take screenshots of their windows.”
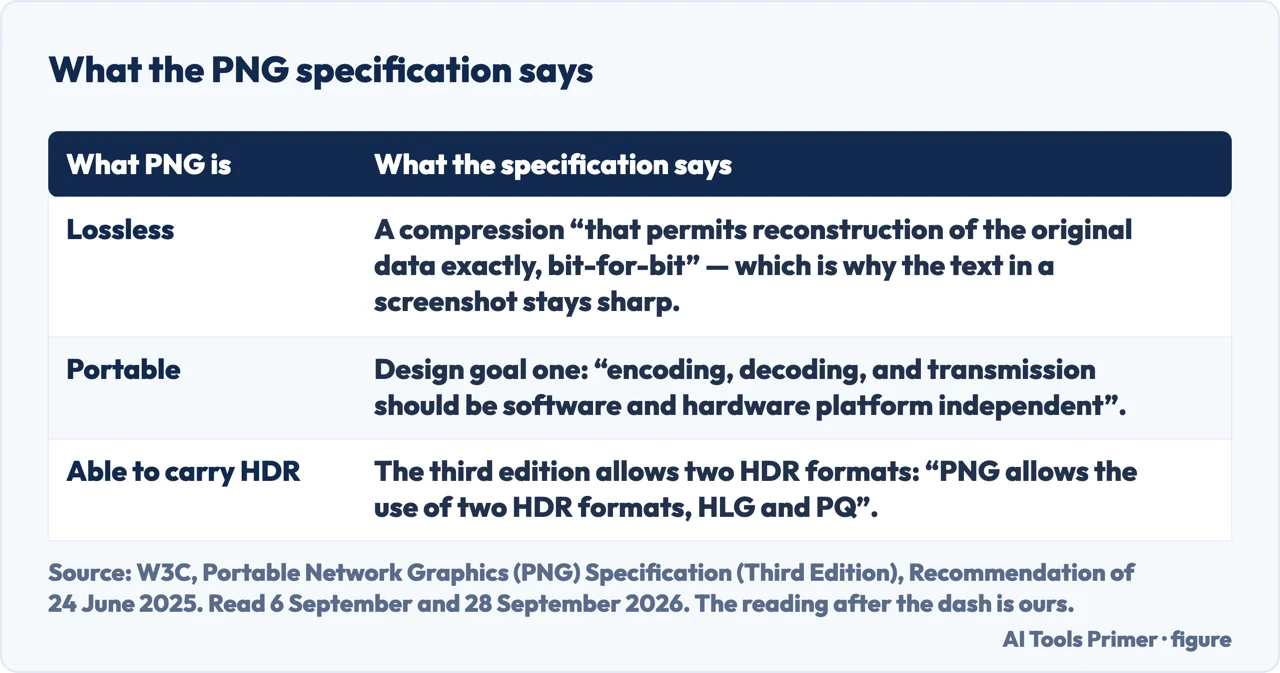
One footnote on the format. Apple’s guide says “Screenshots are saved as .png files”, and PNG is defined by the W3C: the specification defines lossless compression as one “that permits reconstruction of the original data exactly, bit-for-bit”. That is why the text in a screenshot stays crisp. Portability is the first design goal on its list — “encoding, decoding, and transmission should be software and hardware platform independent” — which is the argument for sending somebody a PNG rather than an HDR HEIF, even though the third edition now allows high dynamic range in PNG as well: “PNG allows the use of two HDR formats, HLG and PQ”.
Two more things from Apple’s page are worth knowing before the guides below. The thumbnail that appears in the corner is not a delay to be waited out: you can drag it straight into a message or a folder, or click it to edit the screenshot. And with HDR chosen as the capture format, the Screenshot app captures in HEIF instead of PNG; Apple’s guide adds that HDR “requires an HDR display to see the difference”.
The same answer covers how to take a screenshot on mac, how to take screenshot on mac, how to screenshot on a mac and screengrab mac. And screen record on mac is done by the same Shift-Command-5 toolbar: Apple’s recording page lists Record Entire Screen, Record Selected Window — “available in macOS Tahoe 26 or later” — and Record Selected Portion, and says “By default, recordings are saved to your desktop.”
One habit is worth forming before any of it. Decide, before you press the keys, whether this picture is going to be sent somewhere or kept. If it is going to be sent — pasted into a message, dropped into a document, handed to somebody helping you with a problem — use the Control version and paste it straight in, or drag the thumbnail from the corner into the window that needs it. With the Control version nothing is written to disk, and there is nothing to find and delete afterwards. If it is going to be kept, give the Screenshot app a folder of its own once, and screenshots stop landing on the desktop.
Where to start
Two ways in.
- “I just want the shortcut.”
- It is above. Then where the files go
- “I need to record, not capture.”
- That is recording the screen
Related guides
Screen capture on Android.
On other devices
Screenshots on an iPhone, and screenshots and recording on Windows.
Not covered here. It will not recommend a screenshot app. Three capture shortcuts, the Screenshot app with its timer, editing from the thumbnail, and screen recording are already on the machine.
It will not describe a shortcut it has not checked against Apple’s current page. macOS changes these details between versions, and the Apple pages in the Sources are dated for that reason.
And it will say where the built-in tool depends on the version: recording system audio, for instance, needs macOS 27 Golden Gate or later, where Apple says to “choose Include System Audio”. What holds instead is simple: every shortcut on this page is checked against Apple’s own support documentation, with the date.
Taking a screenshot, whatever you are holding
The same job on the other systems.
- The same job, in the other places it comes up
- How to screenshot on tablet with keyboard, by system
- How to screenshot on Windows: three ways
- How to screenshot on iPhone, and what changed after you press
- How do you screen capture on an Android — three rungs
Sources
- Apple Support — Take a screenshot on Mac, including the shortcuts, the Screenshot app and its Options menu, the capture format on macOS Tahoe 26 or later, the Control key for the clipboard and the default save location — support.apple.com, read 21 August 2026 and, after its republication, 28 September 2026 · page published 14 September 2026.
- Apple Support — How to record the screen on Mac, including the recording controls in the Screenshot toolbar, the default save location and Include System Audio in macOS 27 Golden Gate or later — support.apple.com, read 28 September 2026 · page published 14 September 2026.
- Apple — Mac User Guide, Take screenshots or screen recordings on Mac, including the floating thumbnail, the HDR and SDR capture formats, the file names, the .png format of screenshots and the Keyboard settings for the shortcuts — support.apple.com, read 28 September 2026.
- W3C — Portable Network Graphics (PNG) Specification (Third Edition), W3C Recommendation of 24 June 2025, for the definition of lossless compression as one permitting reconstruction of the original data exactly and bit-for-bit, for portability as the first design goal of the format, and for the two high dynamic range formats the third edition allows — www.w3.org, read 6 September and 28 September 2026.
Written by Alberto Gulotta
Founder and editor of AI Tools Primer, writing from Palermo, Italy. Thirty-five years of taking computers apart, starting with a Commodore 64 — the long version is on the about page.
Something wrong on this page? Write to aitoolsprimer@gmail.com and it gets fixed.
Written on 21 August 2026 · last checked 30 September 2026.
Independence and limits
No affiliate links and no paid placements anywhere on this site. Nobody pays to appear here, and no company has seen this page before you did.
This is general information, not professional advice. Where a page touches money, health, safety or the law, it names its source and the date it was read — and your situation may still differ. See the privacy page and the cookie policy.