
Images · guide
How to fix grainy photos on a Mac, in Lightroom and on iPhone
By Alberto Gulotta · Updated · 9 min read
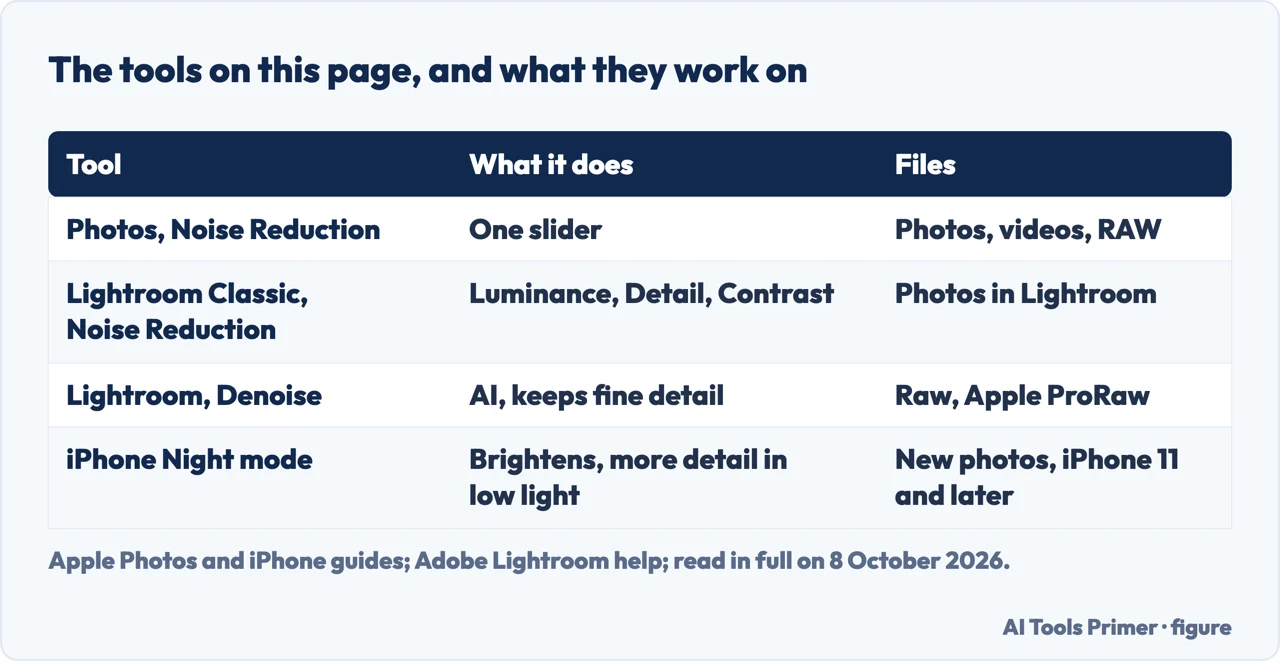
How to fix grainy photos: Apple calls the grain of low-light photos noise, and Photos on a Mac has a Noise Reduction slider under Edit › Adjust. Lightroom Classic has Luminance, Detail and Contrast and, for raw files, AI Denoise; Adobe’s night-photo tutorial sharpens after the noise. On an iPhone, Night mode is for the next low-light photo.
| Tool | Where | What it works on |
|---|---|---|
| Noise Reduction (Apple) | Photos on Mac › Edit › Adjust | Photos and videos, RAW included |
| Sharpen (Apple) | Photos on Mac › Edit › Adjust | Edges: Intensity, Edges, Falloff |
| Noise Reduction: Luminance, Detail, Contrast (Adobe) | Lightroom Classic › Develop › Detail | Grainy night shots, in Adobe’s tutorial |
| Denoise (Adobe) | Lightroom Classic › Detail panel | Raw files, Apple ProRaw DNGs among them |
| Night mode (Apple) | Camera on iPhone 11 and later | The next photo, in low light |
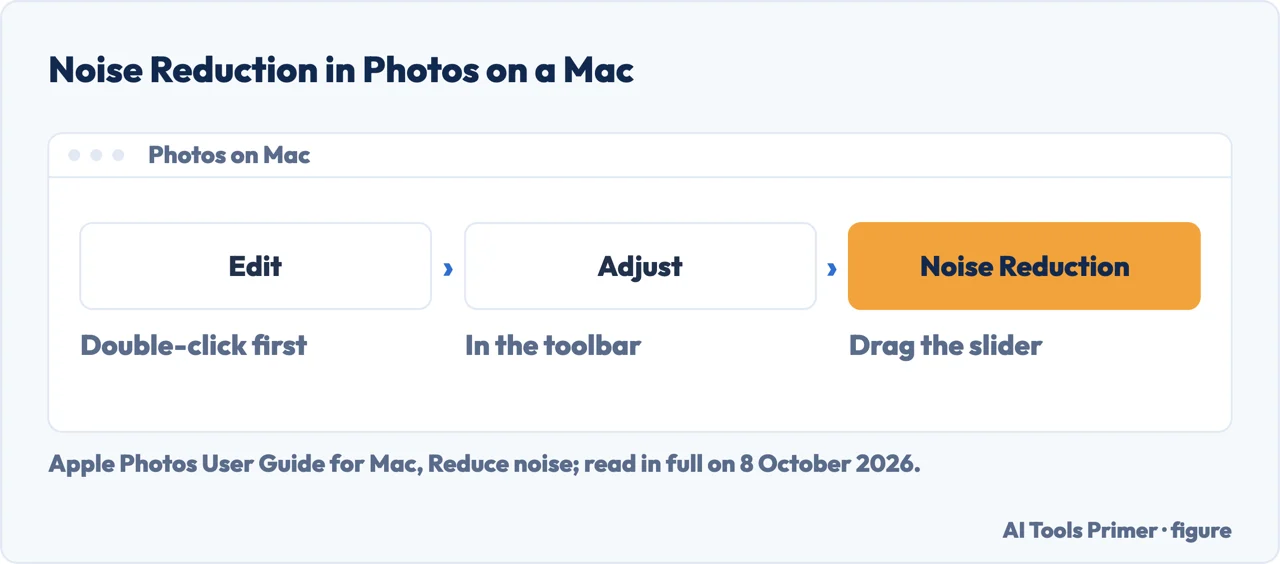
- Open the photo for editing. In Photos on a Mac, double-click the photo or video, then click Edit in the toolbar.
- Click Adjust, then Noise Reduction. Apple’s Photos guide for Mac describes the graininess or speckles of low-light photos as noise, and says this adjustment can reduce or eliminate it.
- Drag the Noise Reduction slider. On RAW images, RAW version 6 or later, Apple says Luminance Noise, Color Noise and Detail sliders appear for fine-tuning.
- Sharpen, a separate adjustment. Apple’s two pages give no order between them; still in Adjust, Sharpen makes edges crisper and better defined, with three sliders: Intensity for the strength, Edges for which pixels count as edges, and Falloff, which makes the effect more or less severe.
- Hold Option for a wider range. Apple’s Sharpen page: hold the pointer over a slider, then press and hold Option to extend its range of values.
Lightroom Classic: the Detail panel
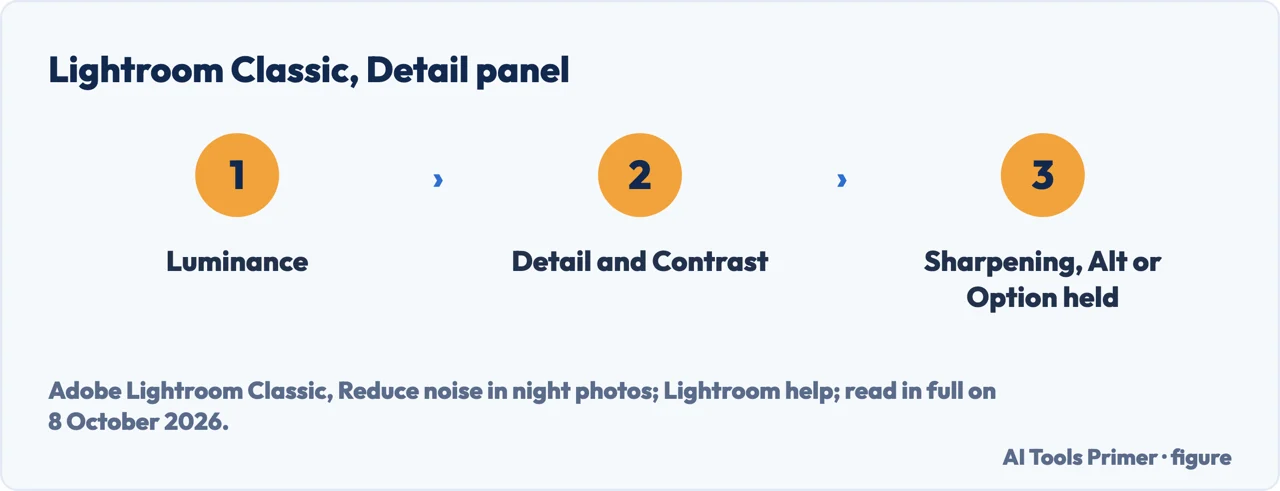
Where. Adobe’s tutorial on grainy night photos, published in June 2026, works in the Develop module with the Detail panel open, and only with Noise Reduction and Sharpening. The Y key cycles through before and after views.
Luminance first. Adobe says the Luminance setting makes the most noticeable change to the noise. Too high and the image is unnaturally soft; too low and it is even more grainy; the ideal is usually in between. Detail and Contrast fine-tune what Luminance did.
Colour. Adobe’s help for Lightroom on the web separates two kinds of noise: luminance, the graininess, and chroma, coloured artefacts, both common at high ISO speeds. There, Color Noise Reduction is the slider for the second; the Lightroom Classic tutorial names only Luminance, Detail and Contrast.
Then Sharpening. Holding Alt on Windows or Option on a Mac while moving the sharpening sliders shows where the sharpening will apply.
Denoise, for raw files
What Adobe says it does. Denoise uses AI to reduce noise without losing the image’s fine detail. In Lightroom Classic it is in the Detail panel, with a slider for the intensity. Adobe recommends using it before other tools such as AI masks and Remove, recommends a faster GPU because it is GPU-intensive, and says an image can be enhanced only once. On macOS, it notes, the Apple Neural Engine does not support AI Denoise, and its help lists an article on Denoise not working in Lightroom Classic 15.3 and earlier.
Which files. Adobe’s list of formats for Denoise names raw files and DNGs, Apple ProRaw DNGs and Samsung Galaxy Expert Raw among them. A JPEG or HEIC photo is not on that list, so for those the sliders above are the route; that conclusion is ours, from Adobe’s list. Adobe’s page was last updated on 1 May 2026, and it asks for macOS Mojave 10.14 or Windows 10 version 1903 or later.
Lightroom on the web
Adobe’s help, last updated on 28 April 2026: in the Detail panel, move Noise Reduction to the right to reduce luminance noise, with Detail to balance noise against detail and Contrast to keep or smooth contrast. Color Noise Reduction handles colour noise; its Detail protects thin colour edges and, set high, may leave colour speckling, while set low it may cause colour bleeding.
Before the next photo, on an iPhone
Night mode. Apple: on iPhone 11 and later, Night mode turns on by itself when the camera detects a low-light environment, and its icon turns yellow; Apple’s guide says it brightens photos and captures more detail. That this helps with grain is our reading. A number next to the icon shows how long the shot will take; for Max, which extends the capture time, tap the arrow above the viewfinder, then the Night mode button below it, then the slider.
Steady. Apple says to hold the iPhone still until the capture completes, or to use a solid surface or a tripod. Turning on Live Photos or the flash turns Night mode off.
Other fixes to the same photo. A picture that has turned blocky rather than grainy is in how to fix pixelated photos, the same problem in a clip in how to fix pixelated video, cutting out the subject in removing a background, and making the file smaller on the phone in how to resize a photo on iPhone.
Where to start
Five ways in.
- “On my Mac.”
- Photos on Mac — photos on a mac
- “In Lightroom Classic.”
- The Detail panel — lightroom classic
- “It is a raw file.”
- Denoise — denoise
- “In a browser.”
- Lightroom on the web — lightroom on the web
- “Next time.”
- Night mode — before the next photo
More on photos
The size, the frame and the background each have a guide of their own.
Questions people also ask
Can grainy photos be fixed?
Reduced, yes: Apple says Noise Reduction in Photos on a Mac can reduce or eliminate noise. Adobe’s Lightroom tutorial gives the trade-off: Luminance set too high makes the image unnaturally soft, too low leaves it even more grainy, and the ideal is usually in between. For raw files, Adobe’s Denoise reduces noise while keeping fine detail.
How do you make a grainy photo clear?
Adobe’s night-photo tutorial for Lightroom Classic reduces the noise, then sharpens: in the Detail panel, Luminance, Detail and Contrast, then the Sharpening sliders, holding Alt or Option to see where they apply. Photos on a Mac has both under Edit › Adjust, Noise Reduction and Sharpen; Apple gives no order between them.
How to fix grainy iPhone photos?
For a photo already taken, Photos on a Mac has Noise Reduction under Edit › Adjust, and Adobe lists Apple ProRaw DNGs, not JPEG or HEIC, among the files Lightroom Classic’s Denoise accepts. For the next one, Apple says Night mode on iPhone 11 and later brightens low-light photos; hold the phone still or use a tripod.
How do I stop my photos from being grainy?
Apple says photos taken in low light may show graininess, which it calls noise, and Adobe says noise is common at high ISO speeds. On an iPhone, Apple says Night mode brightens low-light photos, and a shot might take several seconds; keep the phone steady until it finishes. Turning on the flash or Live Photos switches Night mode off.
Not covered here. It does not cover Photoshop, apps sold for one-tap enhancement, or settings on a dedicated camera.
Nor does it promise a clean result on a given photo: Adobe’s own tutorial says the right Luminance setting is found by trying, between too soft and too grainy.
Sources
- Apple Photos User Guide for Mac — Reduce noise in a photo or video on Mac: Noise Reduction, and the RAW sliders — support.apple.com, read 8 October 2026.
- Apple Photos User Guide for Mac — Sharpen a photo or video on Mac: Intensity, Edges, Falloff and the Option key — support.apple.com, read 8 October 2026.
- Apple Support — Use Night mode on your iPhone: models, capture time, Max, steadiness, flash and Live Photos, published 18 February 2026 — support.apple.com, read 8 October 2026.
- Apple iPhone User Guide for iOS 27 — Take Night mode photos with your iPhone camera — support.apple.com, read 8 October 2026.
- Adobe Learn — Reduce noise in night photos (Lightroom Classic): Luminance, Detail, Contrast and Sharpening, published 11 June 2026 — helpx.adobe.com, read 8 October 2026.
- Adobe Help — Enhance fine details in raw images (Lightroom Classic): Denoise and its formats, last updated 1 May 2026 — helpx.adobe.com, read 8 October 2026.
- Adobe Help — How to adjust Details in an image (Lightroom on the web): luminance and colour noise, last updated 28 April 2026 — helpx.adobe.com, read 8 October 2026.
Written by Alberto Gulotta
Founder and editor of AI Tools Primer, writing from Palermo, Italy. Thirty-five years of taking computers apart, starting with a Commodore 64 — the long version is on the about page.
Something wrong on this page? Write to aitoolsprimer@gmail.com and it gets fixed.
Written on 8 October 2026.
Independence and limits
No affiliate links and no paid placements anywhere on this site. Nobody pays to appear here, and no company has seen this page before you did.
This is general information, not professional advice. Where a page touches money, health, safety or the law, it names its source and the date it was read — and your situation may still differ. See the privacy page and the cookie policy.