Fuzzy Select
connected, similar colourSelects “all parts connected to the starting point by paths containing no large gaps”. GIMP: “It often works very well for selecting a solid-colored (or nearly solid-colored) background area.”

Images · guide
By Alberto Gulotta · Updated · 12 min read
There is a step before the selection that decides whether any of this works, and it is easy to skip because nothing prompts you for it. It takes one menu item, and you can tell whether you need it by looking at a layer name.
“The names of layers that do not have an alpha channel are shown in bold in the Layers Dialog.”
Before any selection tool, the layer has to be able to hold a hole. GIMP’s own note says most layers already can — “except the background layer” — and gives you a way to check without opening a menu: look at whether the layer name is in bold. If it is, deleting a selection will fill it with a colour rather than leave it empty. The fix is one menu item: Layer → Transparency → Add Alpha Channel. Doing this first is the difference between a cut-out and a patch filled with the current background colour.
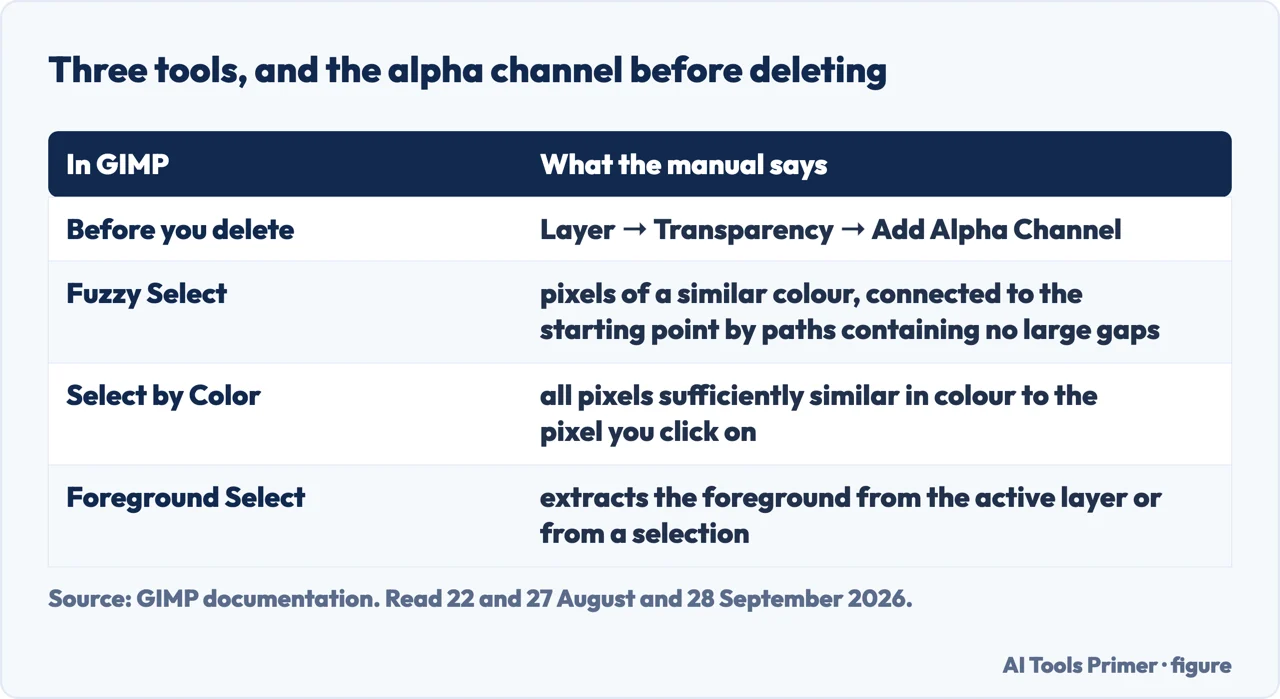
With that done, the question becomes which selection tool. GIMP ships several and they are not interchangeable — the manual separates the first two in one sentence.
Fuzzy Select
connected, similar colourSelects “all parts connected to the starting point by paths containing no large gaps”. GIMP: “It often works very well for selecting a solid-colored (or nearly solid-colored) background area.”
Select by Color
similar colour, anywhere“Selects all pixels that are sufficiently similar in color to the pixel you click on” — GIMP states the difference explicitly: this one does not require the pixels to be joined up.
Foreground Select
when colour will not do itIt “lets you extract the foreground from the active layer or from a selection.” You rough out the object, then paint over what to keep. For subjects a colour rule cannot separate.
The difference between the first two is worth stating again slowly, because it decides which one to reach for. Fuzzy Select follows connection. It spreads out from where you clicked into whatever is joined to it. Select by Color ignores connection entirely and takes every pixel of a similar colour anywhere in the image. A sky broken up by branches is a Select by Color job; a single continuous backdrop is a Fuzzy Select one.
And now the sentence that makes GIMP’s manual worth reading rather than summarising.
“It is fun to use, so beginners often start out using it a lot. You will probably find, however, that the more you use it, the more frustrated you become with the difficulty of selecting exactly what you want, no more, no less.”
That is GIMP’s official manual, about GIMP’s own Fuzzy Select tool. It is the manual describing the experience of using the tool it is documenting, and it is worth taking at face value rather than as modesty. The same page adds the specific trap: “it is very important to pick the right starting point. If you select the wrong spot, you might get something very different from what you want, or even the opposite.”
Two useful things follow from that. First, if you have tried this before and found it maddening, the manual agrees with you — it is not a sign of doing it wrong. Second, the manual names the starting point, so when a fuzzy selection goes strange, the first thing to change is where you clicked.
For anything a colour rule cannot separate — hair against a busy scene, an object that shares its tones with what is behind it — Foreground Select is the tool made for extracting a foreground, and it has a procedure worth following exactly.
Foreground Select, in the manual’s order
Two stages: a rough outline, then painting over what to keep.
Steps three and four are worth naming carefully, because the screen changes into something that does not look like an edit: you are not editing the picture yet. You are telling the tool which parts of your rough outline were the subject, by painting on them. The tool options give you the other direction too — the manual lists Draw foreground, Draw background and Draw unknown, so a mistake is corrected by switching mode and painting over it rather than by starting again.
A warning GIMP puts on its own tool. “The foreground select tool needs a lot of memory for its processing, depending on the size of the image. It is known to crash or slow down when using larger images.” The manual offers two trades rather than a fix: switch the engine from Matting Levin to Matting Global, or raise the number of downsampled Levels “at the cost of using more memory” — and “Both of these options also come with the disadvantage of being less accurate.” Levels applies to Matting Levin only, which the same page says “has been temporarily removed on Windows due to crashes”. So on a large photograph the realistic choices are patience, a smaller copy, or a worse edge — and knowing that in advance is better than discovering it halfway through an outline.
One small practical note from the same page, in case you go looking for a shortcut: there isn’t one. “This tool has no shortcut, but you can set one using Edit → Keyboard Shortcuts” — so if you are going to do this often, that is where to add it.
And if the tool options are not visible at all, the manual gives the route: Windows → Dockable Windows → Tool Options. They normally appear under the toolbox as soon as a tool is active, but a rearranged workspace can hide them, and the tool options mentioned above live there.
What this page will not do is tell you which result is good enough. Edge quality on a cut-out is a judgement, and it depends on where the picture is going — a thumbnail forgives what a full-width header will not. The manual documents the tools; it does not, and cannot, set your standard.
And the tool you already have may be enough. Office has background removal in Word, Excel, PowerPoint, Outlook and Project, the apps Microsoft’s page lists, with one documented limit worth knowing before you go looking for it: for vector files — “Scalable Vector Graphics (SVG), Adobe Illustrator Graphics (AI), Windows Metafile Format (WMF), and Vector Drawing File (DRW)” — “background removal isn’t possible, so in those cases the Remove Background option is grayed out”. A greyed-out button there is not a fault: it is the file type telling you the operation does not apply.
The guides below cover more on images, photos on your devices, and the files around them.
Three ways in. If the deleted area turned white, start with the first.
The same program, the information a picture carries, and the words inside one.
Reading a code from a picture, getting deleted photos back, and moving photos to a computer.
Space, backups and deleted files on the machine the picture lives on.
Not covered here. It will not send you to an upload site. The job described here is done by a free program on your own machine, and a background removal that never leaves the computer is a different proposition from one that does.
It will not pretend the easy tool is always enough. GIMP’s own manual says you will probably find Fuzzy Select more frustrating the more you use it, and a page that left that out would be setting you up for it.
And it will not tell you the result is good. Edge quality is a judgement about where the image is going, and the manual documents tools rather than standards. What holds instead is simple: every GIMP menu route and warning here is the manual’s own, including the place where the manual says you will probably grow frustrated with Fuzzy Select.
Five edits you make to an image between taking it and sending it.
Written by Alberto Gulotta
Founder and editor of AI Tools Primer, writing from Palermo, Italy. Thirty-five years of taking computers apart, starting with a Commodore 64 — the long version is on the about page.
Something wrong on this page? Write to aitoolsprimer@gmail.com and it gets fixed.
Written on 22 August 2026 · last checked 30 September 2026.
Independence and limits
No affiliate links and no paid placements anywhere on this site. Nobody pays to appear here, and no company has seen this page before you did.
This is general information, not professional advice. Where a page touches money, health, safety or the law, it names its source and the date it was read — and your situation may still differ. See the privacy page and the cookie policy.