Images · guide
How to resize an image in GIMP, and the two traps after it
By Alberto Gulotta · Updated · 12 min read
To resize an image in GIMP: Image › Scale Image…, type the width you want, press Scale. That takes about a minute. The reason this gets looked up more than once is that two things go wrong afterwards, and neither of them is on the page that answers the question.
The steps first, from the manual rather than from memory.
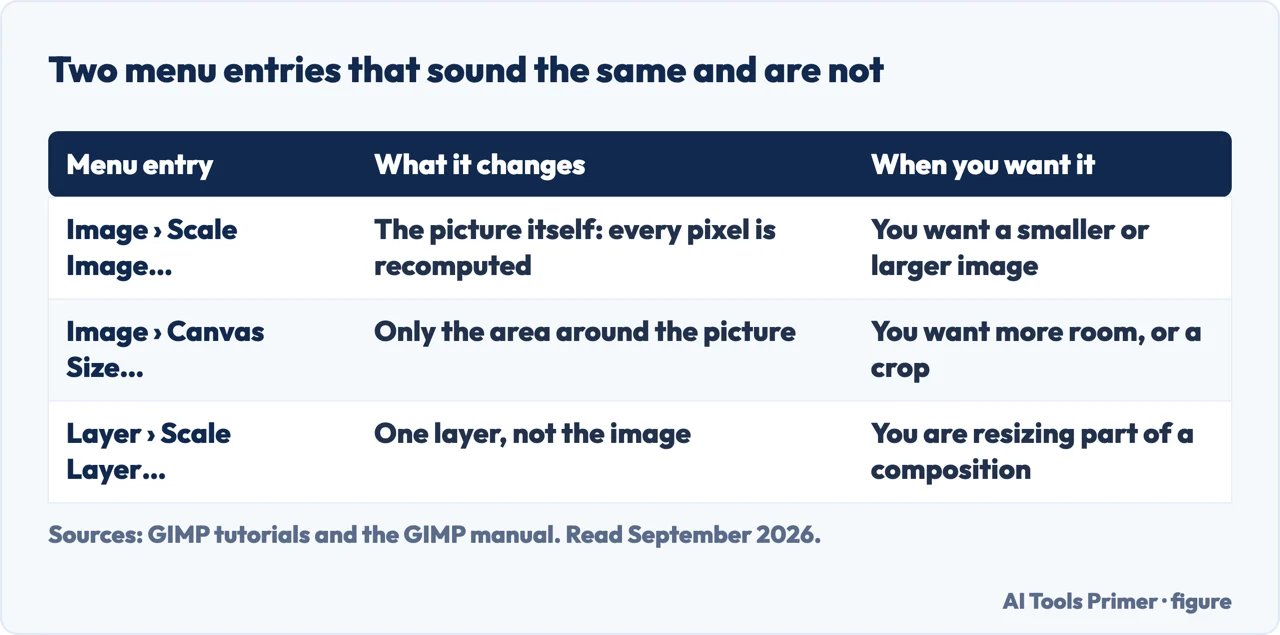
| Menu entry | What it changes | When you want it | Source |
|---|---|---|---|
| Image › Scale Image… | The picture itself: every pixel is recomputed | You want the image smaller or larger | GIMP manual |
| Image › Canvas Size… | Only the area around the picture | You want more room, or a crop | GIMP manual |
| Layer › Scale Layer… | One layer, not the image | You are resizing part of a composition | GIMP manual |
| The chain beside Width and Height | Locks the two together so the proportions hold | Always, unless you mean to distort the picture | GIMP tutorials |
| Quality › Interpolation | How the new pixels are worked out; the default is Cubic | LoHalo when the result matters more than the wait | GIMP tutorials |
The four steps, from GIMP’s own documentation
GIMP 3.2 user manual, read 21 August 2026. Four steps, and two of them are checks rather than actions.
- Ignore the zoom level “GIMP sets the zoom so that it displays nicely on the screen… This does not change the actual image.” The percentage in the status bar is how you are looking at it, not what it is.
- Check the mode in the title bar “If the mode shows as RGB in the title bar, you are fine. If the mode says Indexed or Grayscale”, that is a different job first.
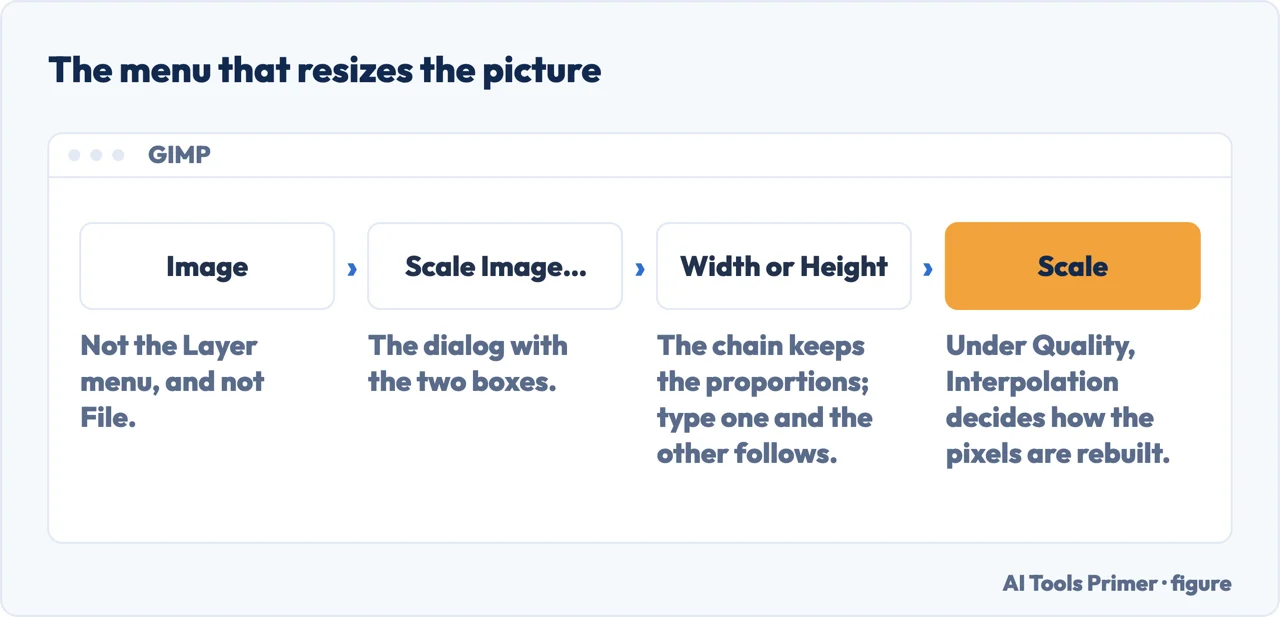
Image → Scale Image…Also reachable by right-clicking the image. Enter the width you want; “when you change one of the image’s dimensions, GIMP changes the other dimension proportionally”, so the picture does not stretch.- Work in pixels, and ignore resolution See the box below — this is the step that undoes the rest.
- Open Image, then Scale Image… Not Canvas Size, which changes the room around the picture and leaves the picture alone.
- Type the width you want. The chain beside the boxes keeps Width and Height locked, so “changing one value will cause the other to change in order to keep the same aspect ratio”.
- Change the unit if you would rather work in percentages. Click the px spinner and choose percent; 50 in either field halves the image.
- Look at Quality › Interpolation before you press Scale. The default is Cubic; GIMP’s own tutorial notes that “to retain the best quality it would better to use LoHalo”.
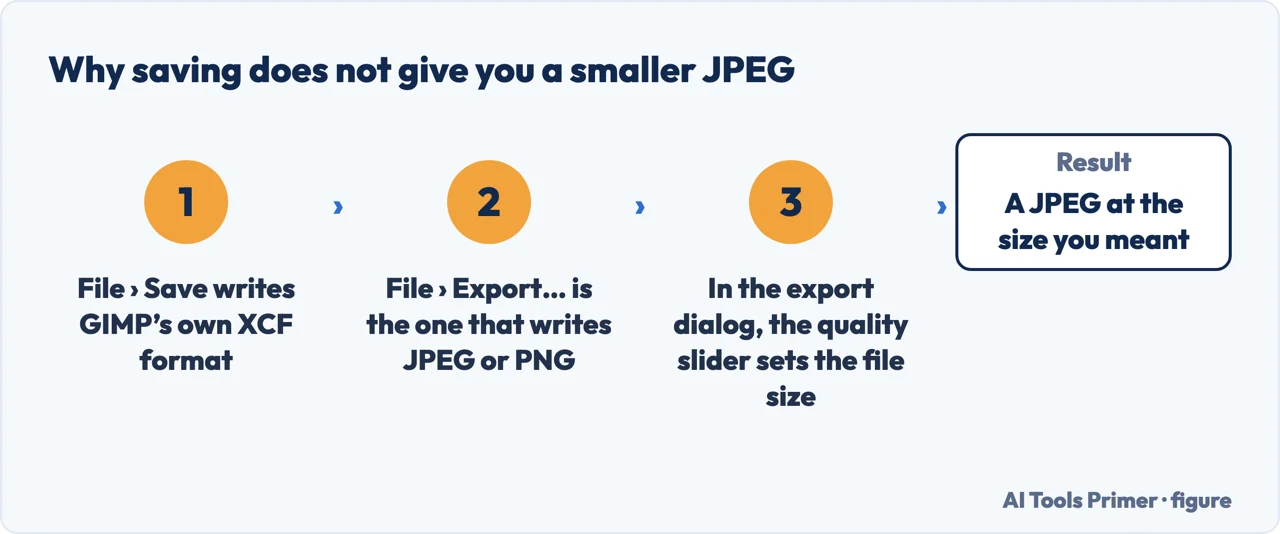
- Export, do not save. File › Save writes GIMP’s own XCF. File › Export… is what writes a JPEG or a PNG, and the quality slider there is what decides the file size.
First trap: the resolution box does nothing for a screen
The Scale Image dialog has two sections, and the second one is a trap for anyone resizing a photo to email or post. GIMP’s manual is unambiguous: “Resolution applies to printing only and has no effect on the image’s size when it is displayed on a monitor or a mobile device.”
The reason it gives is the correct one: different devices have different pixel sizes, so an image that is a certain physical size on a phone “might display on other devices… in another size altogether”. Hence the instruction: “For the purpose of displaying an image on a screen, you can ignore the resolution parameter. For the same reason, do not use any size unit other than the pixel in the height / width fields.”
If you do not know what number to type, the manual gives a range: “common screen sizes range between 600 pixels for simpler phones and 1920 pixels for an HD screen”.
And there is no setting that makes it lossless. ImageMagick’s reference on resizing puts the honest version: resizing “can modify images in very detremental ways, and there is no ‘best way’ as what is best is subjective as to what you actually want out of the resize process”. Going smaller discards pixels; going larger invents them. The interpolation setting chooses how, not whether.
That single paragraph settles an argument people have with themselves for years. Resizing a photo for a website, an email or a message has nothing to do with DPI. The only number that matters is the pixel width, and the resolution field is there for the other job — printing — which is covered on a different page of the same manual.
Second trap: saving does not give you a JPEG
This is the step the tutorial page stops before, and it is where people conclude that GIMP is broken. “Images are loaded and saved as .XCF files. Your JPG image has been loaded as XCF.” File → Save produces GIMP’s own working format, which almost nothing else opens.
To get a normal picture file back out, the manual names two routes: File → Overwrite
image-name.jpg, which replaces the original, or File → Export As, which
opens the Export Image dialog and lets you choose a new name and format.
And one warning worth carrying beyond GIMP entirely: “repeated saving in the JPG format causes more and more image degradation.” Every round trip through JPEG costs quality, so open the original each time rather than re-editing your own exports.
Why GIMP works this way, since it looks like an inconvenience. Its own format keeps everything a picture file cannot: layers, selections, undo history, transparency handled its way. Saving to JPEG would silently throw that away, so the program refuses to blur the distinction — you save your work, and you export a picture. Once you know that, the behaviour stops being a fault and becomes a reasonable position, and it is the same one several other editors take.
Making the file smaller, which is usually the real goal. Scaling and compressing are different levers and people reach for the wrong one. Scaling changes the dimensions — fewer pixels, so a smaller file, and the picture is physically smaller. Compression keeps the dimensions and lowers the quality setting in the Export dialog. The manual states the trade in one line: “the less space an image takes, the more detail from the original image you lose.” For sending a photo, scaling first and then exporting at a sensible quality does more than either alone.
Do you need GIMP for this at all? Honestly, often not. Resizing one image is built into the Photos app on Windows and Preview on a Mac, and neither requires a download. GIMP earns its place when you are doing this repeatedly, when you want precise control over the export, or when you want a full editor that costs nothing and has no subscription attached — which is the reason it keeps arrive at it.
What this guide does not do is compare GIMP against paid editors, because we have not run that test. What is here is the documented behaviour of one free program, quoted from its own manual with the version number and the date, so you can check every sentence against the source.
Where to start
Four ways in.
- “I just need the steps.”
- They are above — then read the two traps in the file afterwards
- “My saved file will not open anywhere.”
- That is the second trap — the file afterwards
- “I only want a smaller file.”
- Go to making it smaller
- “Is there something simpler?”
- See without installing anything
The file afterwards
What comes out of an editor is a separate question from what you did inside it, and it is where the two get confused.
Making it smaller
Scaling and compressing are different levers with different costs, and reaching for the wrong one is the common mistake.
Without installing anything
For a single image, the tools already on your machine are usually enough, and they do not send the file anywhere.
Where images go wrong
Format, size, quality and metadata are four separate things, and most image problems are one of them wearing another’s clothes.
Questions people also ask
How do I resize an image in GIMP?
Image › Scale Image…, type the width you want, and press Scale. The chain beside the boxes keeps the height in proportion, so “changing one value will cause the other to change in order to keep the same aspect ratio”.
What is the difference between Scale Image and Canvas Size?
Scale Image changes the picture — every pixel is recomputed. Canvas Size changes only the area around it, giving you more room or a crop while the picture itself stays exactly as it was.
How do I resize without losing quality?
Going smaller always discards pixels; the choice you have is how they are recombined. GIMP’s own tutorial suggests changing Quality › Interpolation from the default Cubic: “to retain the best quality it would better to use LoHalo”. Going larger invents pixels, and no setting avoids that.
Why did GIMP save an XCF file instead of a JPEG?
Because Save writes GIMP’s own working format, which keeps layers and history. To get a JPEG or a PNG you use File › Export…, where a quality slider also decides how big the file is.
Not covered here. It will not tell you to change the DPI to resize for a screen. The manual says resolution “applies to printing only”, and that sentence is quoted above because it settles the most common confusion in this subject.
It will not compare GIMP with paid editors. We have not run that test, and until we have, a verdict here would be an impression.
And it will not send you to an upload site to do something your own computer already does — which, for a single image, it does. What holds instead is simple: every step and every quotation on this page comes from the GIMP 3.2 user manual, with the date it was read.
Working on a picture before you use it
Five edits you make to an image between taking it and sending it.
- The same job, in the other places it comes up
- How to remove background in GIMP: three tools, one setting
- How to fix pixelated photos: three causes, one hard limit
- How to crop a picture on Mac, and which tool to use
- How to reduce image file size, two different ways
Sources
- GIMP 3.2 user manual — Change the Size of an Image for the screen, on zoom versus size, image mode, Scale Image, and why resolution applies to printing only — docs.gimp.org, read 21 August 2026.
- GIMP 3.2 user manual — Compressing Images, on saving as XCF, File → Overwrite and File → Export As, and the degradation caused by repeated JPEG saving — docs.gimp.org, read 21 August 2026.
- GIMP Quickies, on gimp.org — the same steps written for a beginner, with the chain that locks Width and Height and the note that LoHalo keeps more quality than the default Cubic — www.gimp.org, read 3 September 2026.
- ImageMagick — Resizing or scaling, general techniques: an independent reference on what happens to the pixels, and the statement that there is no best way because best depends on what you want out of it — usage.imagemagick.org, read 3 September 2026.
Written by Alberto Gulotta
Founder and editor of AI Tools Primer, writing from Palermo, Italy. Thirty-five years of taking computers apart, starting with a Commodore 64 — the long version is on the about page.
Something wrong on this page? Write to aitoolsprimer@gmail.com and it gets fixed.
Written on 21 August 2026 · last checked 3 September 2026.
Independence and limits
No affiliate links and no paid placements anywhere on this site. Nobody pays to appear here, and no company has seen this page before you did.
This is general information, not professional advice. Where a page touches money, health, safety or the law, it names its source and the date it was read — and your situation may still differ. See the privacy page and the cookie policy.