Word has two things that look like a checkbox and they are not interchangeable. Getting how to insert a checkbox in word right is almost entirely a matter of answering one question first, and Microsoft answers it by naming the second one plainly: it calls that route “create a print only list”.
ticked on a screen
A content control
A real control that responds to a click. Microsoft: “Select a checkbox to put an X (or
other character) in the check box.”
It lives on the Developer tab, which is hidden until you turn it on — and that single fact
is why the tab looks as though it is missing.
ticked with a pen
A bullet shaped like a box
Microsoft calls this one exactly what it is: “Create a print only list.” It is a bullet
character, so nothing happens when you click it.
Which is right for a form somebody fills in on paper, and wrong — silently — for one you email to
a colleague.
So decide before you start: will this be ticked on a screen or with a pen? A printed form wants the bullet, because it is simpler, it needs no hidden tab, and every new line gets its own box automatically. A form you email wants the control, because a bullet that does not respond to a click makes the recipient think the document is broken.
The clickable one
Windows. On a Mac the button is called Check Box and Microsoft suggests pressing Tab or
Spacebar after it for the gap.
Turn on the Developer tab. It is off by default, and nothing on this route works until it is on.
Type the list first.
Go to Developer and select the Check Box Content Control at the beginning of the first line.
“Copy and paste the check box control at the beginning of each line.” There is no bulk apply — one, then paste.
The default tick mark is an X. Microsoft documents changing it to a checkmark if you prefer.
The printable one
No Developer tab needed. This is a bullet, defined once and reused.
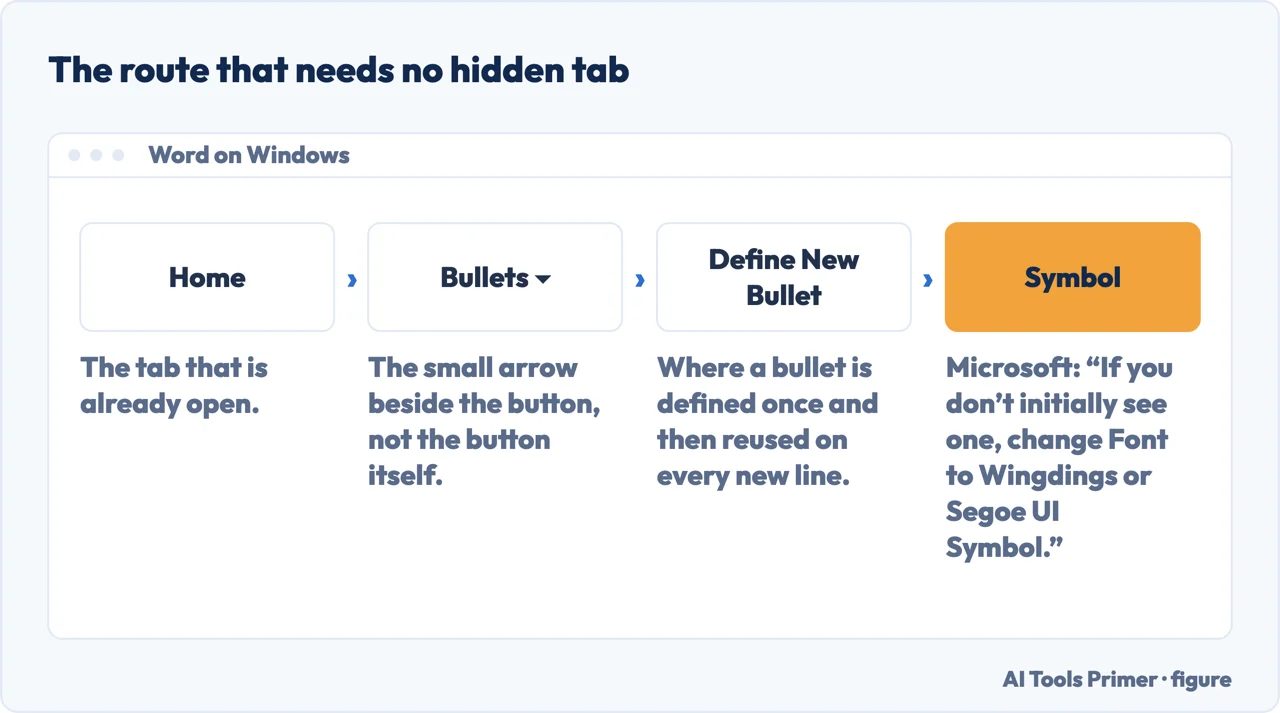
Home, then the down arrow next to the Bullets button.
Choose Define New Bullet.
Select Symbol and find a box character. Microsoft’s tip is the one people need: “If you don’t initially see one, change Font to Wingdings or Segoe UI Symbol.”
OK twice, then type the list. Every new line gets a box, which is the advantage over the other route.
The route that needs no hidden tab. Quotation from Microsoft. Figure drawn by AI Tools Primer.
The step that turns a document into a form
Once the boxes are in, anybody opening the file can also retype your questions, delete a line, or
change what they are agreeing to. Microsoft documents the fix in one line and it is worth knowing,
because it is the difference between a list and a form.
Select the list and checkboxes, then Developer › Group › Group. The text is locked and the
boxes still tick. To edit it again yourself: “select the list and choose Group › Ungroup”.
It is not a security measure — anybody can ungroup it the same way you did. It is a guard against
accident, which is what almost every ruined form actually suffers from.
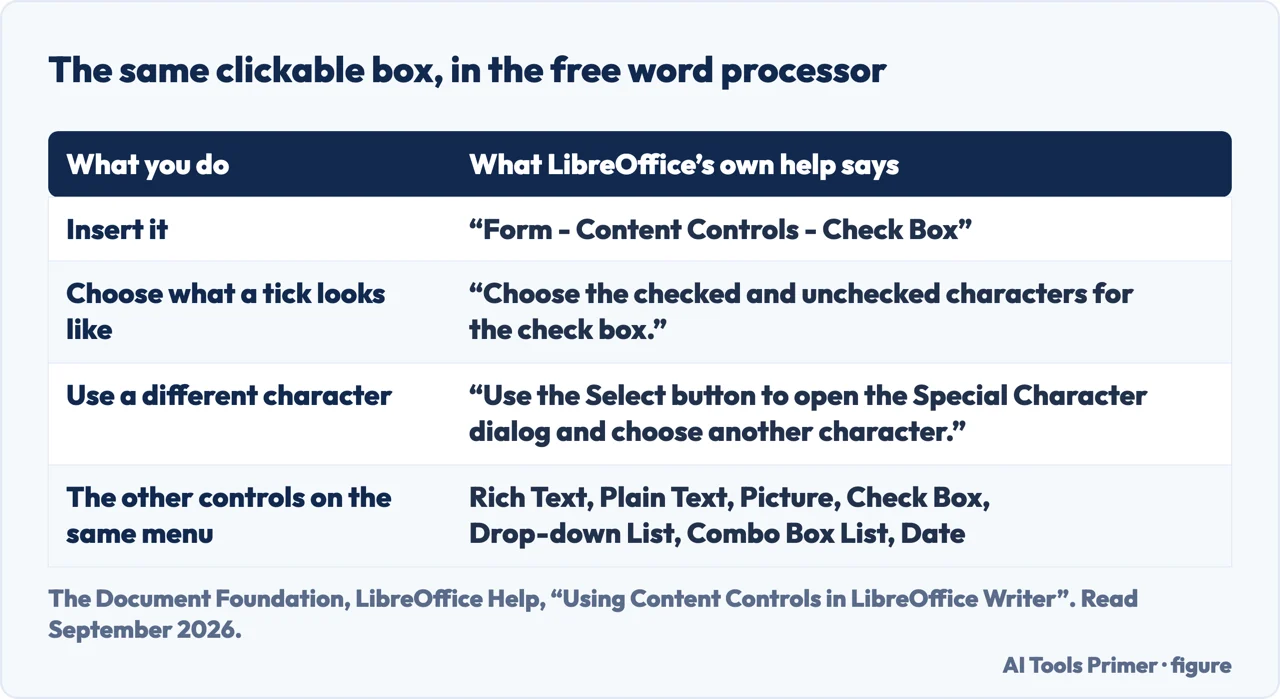
Quotations from LibreOffice’s own help. Figure drawn by AI Tools Primer.
Add or insert, and the tab that is not there. How to add a checkbox in word and how to insert a checkbox in word are the same question, and the answer to both starts in the same place: the Developer tab, which is switched off by default. Nothing on the Insert menu will ever produce a tickable box, no matter how long you look.
If the list items run to more than one line, both routes need the same tidying, and Microsoft gives the numbers. Select the list — “bullets or numbers won’t look selected”, which is the note that stops people thinking it failed — then the Paragraph dialog, Indentation Left, and choose Hanging under Special. Without it, the second line of an item sits under the box instead of under the text, and a long checklist looks like a ransom note.
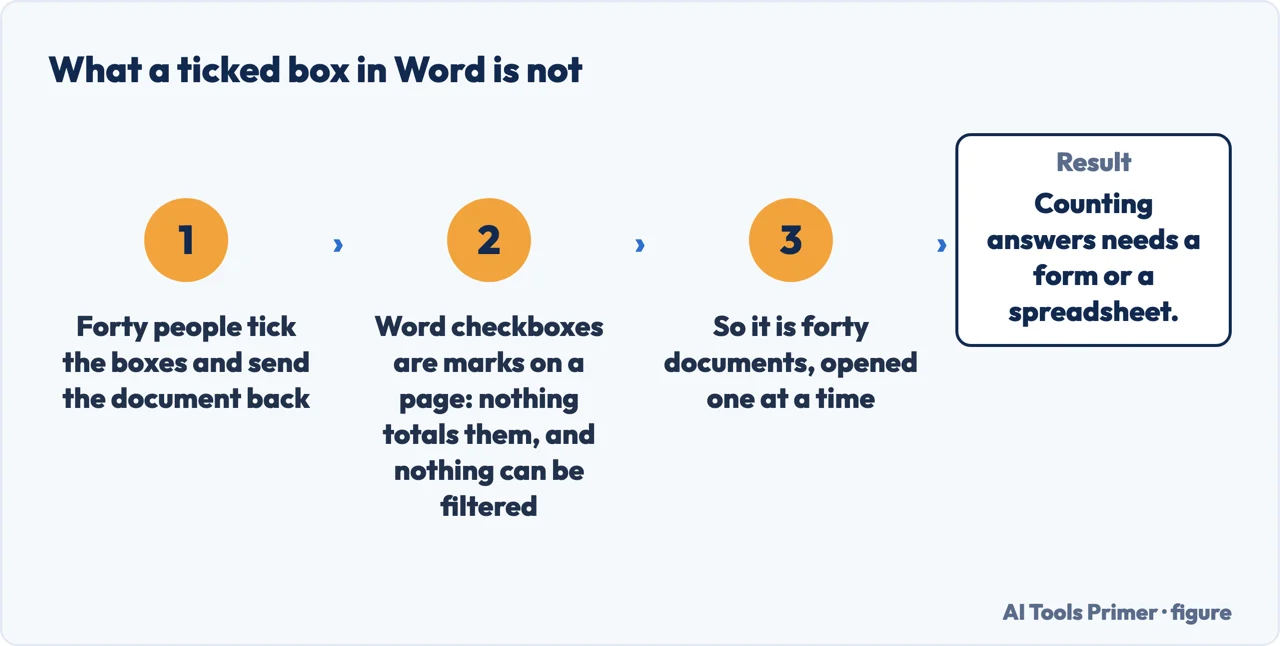
One thing neither route gives you: a count. Word checkboxes are marks on a page, not data. Nothing adds up how many are ticked, nothing can be filtered, and a form returned by forty people is forty documents to open. If what you actually want is answers you can total, the tool is a form or a spreadsheet, and the guides below cover both.
The argument is ours. Figure drawn by AI Tools Primer.
The two routes, the Wingdings tip, the grouping step and the note about selecting a bulleted list are quoted from Microsoft’s own Word documentation, read on 22 August 2026 and listed below. The screen-or-pen test, and the point about checkboxes not being data, are ours.
Not covered here. It will not give you one method and call it the answer. There are two, they behave differently, and Microsoft names one of them print only.
It will not skip the Developer tab. It is off by default, and that single fact is where most attempts at the clickable route end.
And it will not suggest a form-builder product for something Word does on two tabs. What holds instead is simple: both routes and the symbol font tip are quoted from Microsoft’s own Word documentation, read on the date this page names.
Sources
Microsoft Support — Make a checklist in Word, including the Check Box Content Control route, the print only list route, the Wingdings and Segoe UI Symbol tip, hanging indentation and locking the list with Developer › Group — support.microsoft.com, read 22 August 2026.
The Document Foundation — LibreOffice Help, Using Content Controls in LibreOffice Writer, for the free word processor’s own check box control, the seven kinds of content control, and the setting that chooses the checked and unchecked characters — help.libreoffice.org, read 5 September 2026.
AG
Written by Alberto Gulotta
Founder and editor of AI Tools Primer, writing from Palermo, Italy. Thirty-five years of
taking computers apart, starting with a Commodore 64 — the long version is on the
about page.
Written on 22 August 2026 · last checked 23 September 2026.
§
Independence and limits
No affiliate links and no paid placements anywhere on this site. Nobody pays to appear here,
and no company has seen this page before you did.
This is general information, not professional advice. Where a page touches money, health,
safety or the law, it names its source and the date it was read — and your situation may
still differ. See the privacy page and the
cookie policy.