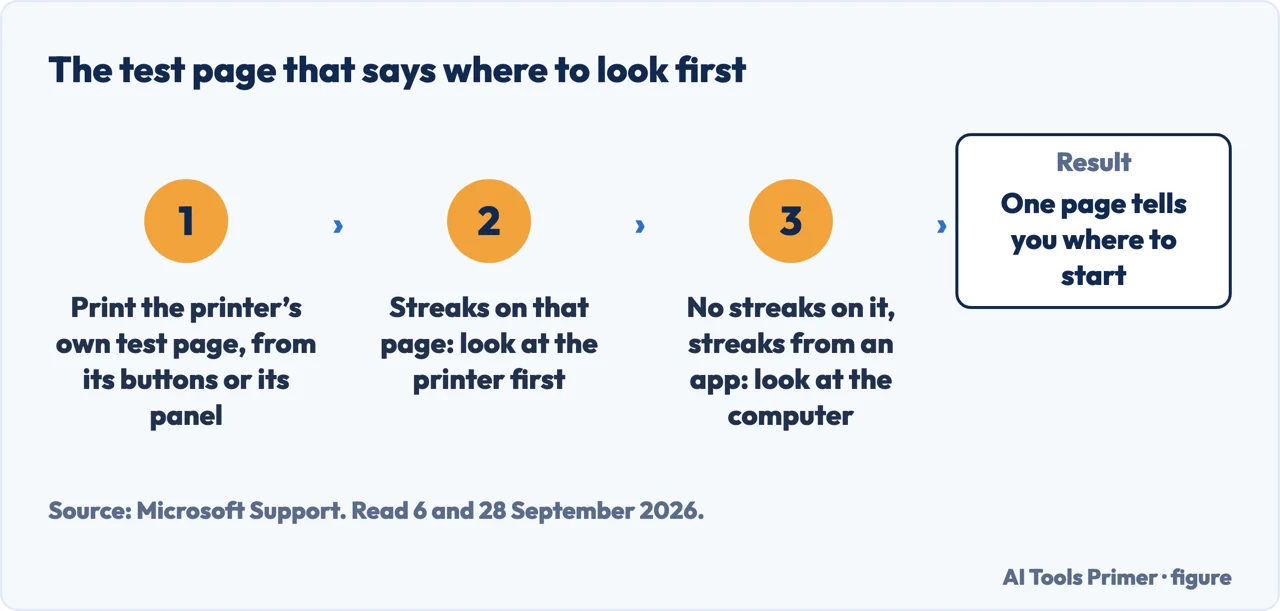
How to fix printer streaks has a step that belongs before all the others, and Microsoft puts it second rather than first, which is close enough. It costs one sheet of paper and it tells you where to look next.
Microsoft’s step 2 — “Check basic print quality from another source”
“This helps determine whether the issue is with Windows or the printer.”
“Print a test page directly from the printer’s control panel.”
“If the test page also looks poor, clean or service the printer hardware.”
“If the test page looks fine, continue with the steps below.”
One sheet, no computer involved. A test page printed from the machine’s own panel never passes through Windows, so streaks on it point to the hardware and a clean one points to the computer side.
Microsoft puts this second, before any setting is touched. It tells you where to go next: to the hardware, or on through the steps below.
One page tells you where to start. Figure drawn by AI Tools Primer.
Without that test, every list of fixes is a list of things to try in the dark. Some of them address the printer and some the computer, and until you know which side you are on you are working through both. Microsoft names the causes at the top — “incorrect printer settings, outdated drivers, low ink or toner levels, or printer hardware problems”, plus a paper type or print resolution that “doesn’t match your printer’s capabilities” — and those fall on opposite sides of the line.
The test page is streaked too
the hardware half
Microsoft’s instruction is plain: “clean or service the printer hardware”.
On an inkjet: open the printer’s own software or panel and run Clean printhead,
Align printhead, or Maintenance tools.
Check the basics first — cartridges “aren’t empty or expired”, no jammed paper or
debris inside, and a restart of the printer.
The test page is clean
the Windows half
Go to Printing preferences and look at three settings — see below.
Update or reinstall the driver from Device Manager.
Try another app, and another file, to see whether it is one program.
Restart the Print Spooler.
The hardware half is mostly obvious once you are in it, with one exception worth reading before you start: Microsoft’s first step starts with the paper before it reaches the ink. It asks you to check that “the correct paper type and size are loaded”, and to use “clean, dry paper that meets the printer manufacturer’s recommendations”.
“Repeat the cleaning process only if needed, as it may use additional ink.”
Worth having before you run a head clean three times in a row hoping it improves. Cleaning
is not a free operation — it works by pushing ink through the nozzles, so each cycle costs
some of what you were trying to conserve. Microsoft says it once and moves on; it is the kind of
sentence that saves a cartridge.
Microsoft’s hardware step names one machine only. Its step 5 is written for inkjet printers — Clean printhead, Align printhead, Maintenance tools — and a laser printer has none of those parts. It has a corona wire, a drum and a fuser instead, and they fail in ways no amount of head cleaning will touch. So the test page that sent you into this half asks a second question before any of it is useful: which of the two machines is on the desk.
An inkjet
nozzles, alignment, paper path
Epson starts with the free test: “Run a nozzle check to see if any of the print
head nozzles are clogged. Then clean the print head, if necessary.”
Cleaning and aligning are two separate jobs. If bands survive both, “you can finely
tune the horizontal or vertical alignment in the Maintenance menu”.
Not every streak is a nozzle: “When vertical banding appears or the paper is
smeared, clean the paper path.”
After a long time unused, “run the Power Cleaning utility” — the heavier cycle,
and the last one to reach for rather than the first.
A laser
corona wire, drum, toner, fuser
Brother’s first printing step also costs nothing: “Clean the primary corona wire inside the
drum unit by sliding the green tab”, then check that “the green tab of the primary corona wire is at the home position”.
Only then parts, and in that order: “Put in a new drum unit”, and after it
“Put in a new toner cartridge”.
Last: “The fuser unit may be contaminated. Call your dealer or Brother Customer
Service.” That one is not a home repair, and it is the only step here that is not.
One line in Brother’s list belongs to a different machine altogether. Ahead of every printing part it puts “wipe the scanner glass strip with a dry lint free soft cloth”, on models with a document feeder. It sits in a print-quality list because a copy is also a scan: on those models a sheet fed through the document feeder passes the glass strip, so a mark there can land on copies made that way, while a document printed from the computer never goes near it. If the streak shows up when you copy and not when you print, nothing is wrong with the printing at all.
The Windows half has one item worth ruling out first.
The three settings to check, and where they live
Windows 11: Settings → Bluetooth & devices → Printers & scanners → your printer → Printing preferences. Windows 10: Settings → Devices → Printers & scanners → your printer → Manage → Printing preferences.
“Print quality or resolution is set to Normal or Best.”
“Economy, Draft, or Toner saver mode is turned off.”
Microsoft’s own words: “Incorrect print settings can reduce output quality.”
“The selected paper type matches what you’re using.”
That middle line is the one to check first. Economy, Draft and Toner saver are the modes Microsoft asks you to turn off, and a printer in one of them is doing what it was told. Nothing about the printed page announces that it is a choice rather than a fault.
If the settings are right, Microsoft’s next step, on Windows 11 and on Windows 10, is the automated Printer troubleshooter in the Get Help app. After the cleaning step covered above come the ordinary ones: update the driver from Device Manager and, if there is no update, “select Uninstall device”, restart, and “Windows will attempt to reinstall the printer drivers automatically”. Then print the same document from another app — Microsoft suggests Notepad or Word — because a problem that appears in only one program is a problem with that program. And finally restart the Print Spooler from services.msc.
If the complaint is blurry rather than streaked, it is a different
step. Microsoft separates them: streaking and fading point at the printer or its settings,
while blurriness gets its own step about scaling. Make sure the app you print from is up to date, “verify image resolution and print scaling” inside it, and “avoid enlarging low-resolution images before printing”. Microsoft’s own words: “Blurry text or images can sometimes be caused by scaling or app issues.” A picture that
looked acceptable on screen at a quarter of the page does not survive being stretched across all
of it, and no printer setting can put back detail that was never in the file.
What this page will not do is tell you how to clean a specific printer. The command is called Clean printhead on some machines and something else on others, it lives in the printer’s own software or on its panel, and the manufacturer is the only one who knows which.
It will not recommend third-party ink or refill kits. Microsoft’s instruction is that cartridges should not be “empty or expired”, and everything past that is a purchasing decision this site has run no test on.
And it will not tell you a streak means the printer is finished. Microsoft’s own list goes through paper, cartridges that “aren’t empty or expired”, a test page, settings, a troubleshooter, a cleaning cycle and a driver, and it does not end with a new printer.
Where to start
Three ways in. Print the test page first; it tells you which of the other two to read.
A page printed from the machine’s own panel never passes through Windows. What it shows points to the hardware; what it does not show points to the computer.
Not covered here. It will not tell you how to clean your particular printer. The command has different names on different machines and lives in software the manufacturer wrote.
It will not recommend ink, refills or third-party cartridges. Microsoft says cartridges should not be empty or expired; the rest is shopping, and nothing here has been tested.
And it will not conclude that streaks mean a dead printer. Microsoft’s own list goes through paper, cartridges, a test page, settings, a troubleshooter, a cleaning cycle and a driver. What holds instead is simple: the printer’s own test page points to the half to look in, and the ink and laser routines come from the companies that build those printers.
The printer jobs
Everything that happens between pressing print and holding the page.
Microsoft, Fix poor print quality in Windows (Blurry, faded, or streaked prints) — Microsoft Support, applies to Windows 11 and Windows 10 (that blurry, faded or streaked prints may be caused by incorrect printer settings, outdated drivers, low ink or toner levels or printer hardware problems, and can also occur when the paper type or print resolution does not match the printer’s capabilities; step 1 checking that the correct paper type and size are loaded, that the paper is clean and dry and meets the manufacturer’s recommendations, that ink or toner cartridges are not empty or expired, that jammed paper or debris is removed, and restarting the printer; step 2 printing a test page directly from the printer’s control panel to determine whether the issue is with Windows or the printer, cleaning or servicing the printer hardware if the test page also looks poor and continuing with the remaining steps if it looks fine; step 3 checking, under Settings, Bluetooth & devices, Printers & scanners and Printing preferences on Windows 11, or under Settings, Devices, Printers & scanners, Manage and Printing preferences on Windows 10, that print quality or resolution is set to Normal or Best, that Economy, Draft or Toner saver mode is turned off and that the selected paper type matches, then selecting Apply; step 4 running the automated Printer troubleshooter in the Get Help app on Windows 11 and on Windows 10; step 5 for inkjet printers opening the printer’s software or control panel and running Clean printhead, Align printhead or Maintenance tools, repeating the cleaning process only if needed as it may use additional ink; step 6 updating the driver through Device Manager and, if no update is available, selecting Uninstall device, restarting, and letting Windows reinstall the drivers; step 7 for blurry prints keeping printing apps up to date, verifying image resolution and print scaling in the app, and avoiding enlarging low-resolution images before printing; step 8 printing the same document from another app such as Notepad or Word and trying a different file; and step 9 restarting the Print Spooler service by pressing Windows key + R, typing services.msc, locating Print Spooler and selecting Restart) — support.microsoft.com, read 6 and 28 September 2026.
Epson, White or Dark Lines in Printout — Epson Support (that when white or dark lines, also called banding, appear in a printout you should run a nozzle check to see if any of the print head nozzles are clogged and then clean the print head if necessary; that the paper type setting should match the type of paper loaded; that the printable side of the paper should be loaded correctly for the product; that high speed settings in the product software should be turned off; that the print head should be aligned; that the print quality should be adjusted in the product software; that if horizontal or vertical bands or streaks continue after cleaning and aligning the print head the horizontal or vertical alignment can be finely tuned in the Maintenance menu; that if horizontal bands or streaks continue after cleaning the print head and adjusting the print quality, print quality adjustments should be made for each paper type; that when vertical banding appears or the paper is smeared the paper path should be cleaned; that the ink may need refilling and the ink level should be visually checked; and that if the product has not been used for a long time the Power Cleaning utility should be run) — files.support.epson.com, read 23 August 2026.
Brother, Black lines down the page — Brother Support, MFC-L5700DW (that on models with an Automatic Document Feeder the scanner glass strip should be wiped with a dry lint free soft cloth; that the primary corona wire inside the drum unit should be cleaned by sliding the green tab; that the green tab of the primary corona wire should be left at the home position; that a new drum unit should be put in if the drum unit may be damaged; that a new toner cartridge should be put in if the toner cartridge may be damaged; and that the fuser unit may be contaminated, in which case the dealer or Brother Customer Service should be called) — support.brother.com, read 23 August 2026.
AG
Written by Alberto Gulotta
Founder and editor of AI Tools Primer, writing from Palermo, Italy. Thirty-five years of
taking computers apart, starting with a Commodore 64 — the long version is on the
about page.
Written on 22 August 2026 · last checked 30 September 2026.
§
Independence and limits
No affiliate links and no paid placements anywhere on this site. Nobody pays to appear here,
and no company has seen this page before you did.
This is general information, not professional advice. Where a page touches money, health,
safety or the law, it names its source and the date it was read — and your situation may
still differ. See the privacy page and the
cookie policy.